 Free shipping on orders over €199


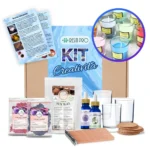
Creativity Kit: Handcrafted Candles (COMPLETE KIT + GLASSES)
 Available, ready for shipping
 Order now to receive your product between
Thursday 23 July
and
Monday 27 July.
Order now to receive your product between
Thursday 23 July
and
Monday 27 July.
 Shipping €13.90 - Free for orders over €199
€49,90
🕯️ Candle kit with container 🌈
Discover the joy of creating homemade candles and immerse yourself on a sensory journey of colours and scents! 🎨🌸
Dive into a creative adventure with our Candle Kit with Container! 🌟 This kit gives you everything you need to make your own candles:
- 500 grams of eco-friendly 🌿 soy wax
- Elegant glasses with wooden 🪵 lids
- 10 wooden wicks with stickers;
- Two irresistible fragrances 🌺
- 2 bright dyes 🎨
- gloves and mixing tools;
- A step-by-step guide that will tell you how to make scented candles.
Experiment with layers of different colours to create rainbow 🌈 candles, play with the marble effect for a more sophisticated look, and customise your candles with unique labels.
We choose the perfect materials for you and guide you through the technical part of the process: all you have to add is your creativity 🌟
Let yourself be inspired by colours and scents, relax and make your space truly unique. 🕯️💖✨
Order now!
Description
Description
Step-by-Step Guide:
- Lay out a plastic sheet or old newspapers to protect the work surface. Make sure all materials are within reach.
- Place the saucepan in a double boiler to melt the wax gently; Heat until the wax melts completely. Use the thermometer to monitor the temperature, making sure it doesn’t exceed 80°C. Make sure no condensation drips into the wax!
- Now it’s time to prepare the wooden wick. To do this, dip the wooden wick into the melted wax for a few seconds. This helps the wick light more easily and burn evenly when the candle is lit.
- While the wax is still runny, add your chosen fragrance and candle coloring. For a perfect aromatic atmosphere, consider adding fragrance in the proportion of 20-50 drops for every 250 gr of wax. Gradually introduce the candle tincture, stirring constantly until you reach the ideal shade. It is essential to incorporate these elements while the wax retains its heat; Otherwise, a slight heating is recommended for optimal mixing.
- Secure the wooden wicks to the center of each tumbler using the candle stickers included in the kit. Peel off the candle sticker and place it on the bottom of the metal base of the wooden wick. Press the metal base firmly into the center of the glass bottom.
Next steps and more ideas!
- Carefully pour the scented and colored wax into each prepared glass cup, making sure the wick stays centered. Leave some space at the top to secure the wooden lid. Let the candles sit undisturbed until they have completely cooled and set. This may take a few hours.
- Cut the wicks to the desired length (usually about 5-10 mm above the wax).
Reviews
Reviews
COD:
KIT-CANDELE-IN-BICCHIERE
Creativity Kit: Handcrafted Candles (COMPLETE KIT + GLASSES)
€49,90
1